Customize Neovim into a quality code editor
Published 10:00 13th June 2022

Preface
Despite having a powerful keymap, Neovim or even Vim have a pretty bad default interface. In this article, I will work with you to set up a (much) better coding environment, even to meet your daily workflow.
Install Neovim
There are many ways to install Neovim even from the command line, like using LaunchPad PPA repo, Snapcraft, Flatpak, etc. However, most of these parties have not updated to the latest version. At the time of writing, Neovim has been out for 0.7 for 2 weeks. And in this article I will try to use this latest version for demo, so that even those who approach later are not too outdated ? And in this article I will use Homebrew .sh/Homebrew-on-Linux)
brew install neovim
After successful installation, you can type nvim (not neovim) and it will take you to the start screen of Neovim. New version but default interface is still as bad as previous versions =))
If you are already inside, please :q to exit, then we will create a config file and start the customization journey Neovim
Option
As I said in the previous post, Neovim supports both VimScript and Lua, but due to my current level and I accidentally approached Vim with VimScript so in this article, the configs will be written on VimScript.
Neovim (and also Vim) get config from a specific path ~/.config/nvim/init.vim (or ~/.config/nvim/init.lua if you like) use Lua). At the moment this file must not exist because I just installed it, and Neovim is using all default configs. We will create and open this file.
install -Dv /dev/null ~/.config/nvim/init.vim
nvim ~/.config/nvim/init.vim
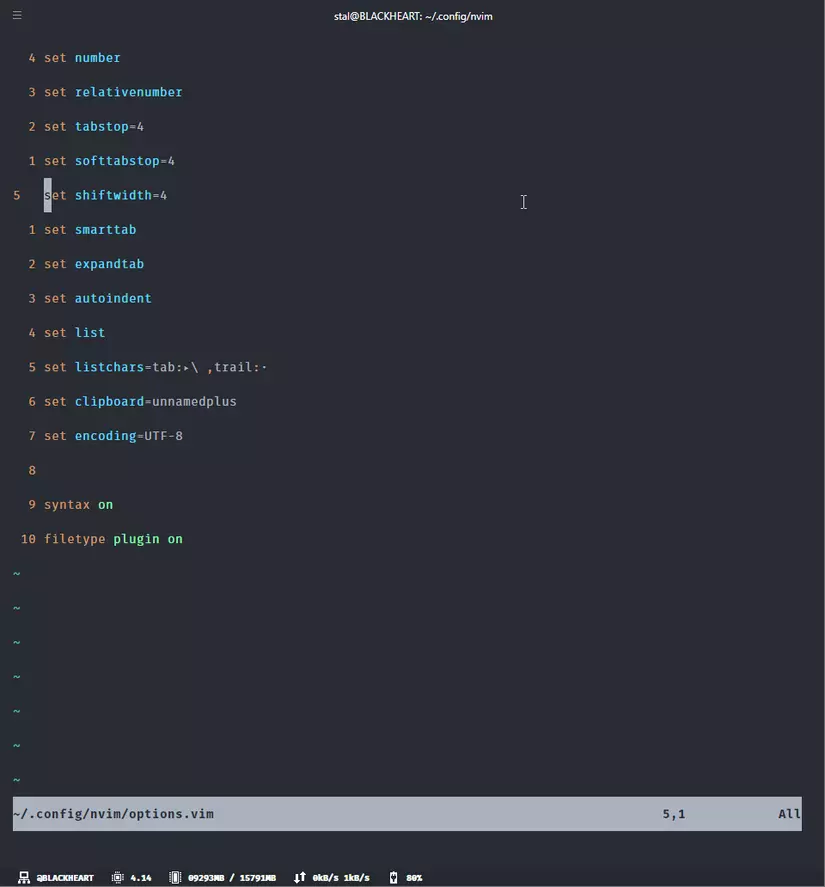
Next, let's add a few options to increase user sympathy
set number
set relativenumber
set tabstop=4
set softtabstop=4
set shiftwidth=4
set smarttab
set expandtab
set autoindent
set list
set listchars=tab:▸\ ,trail:·
set clipboard=unnamedplus
set encoding=UTF-8

syntax on
filetype plugin on
Let's explain it a bit
-
numberandrelativenumberhelp to display the numbered line in relative form, you can look at it and know what your action combination will be, for example, on line 5, want to delete to the end of theset line. mouse=athen pressd7j(pressuto undo the deletion) -
tabstop,softtabstop,shiftwidth,smarttab,expandtab,autoindentto redefine some behavior ofTaband indent buttons -
listandlistcharsmake it easy to visualize what the gaps are -
clipboard=unnamedplushelps Neovim to share clipboard memory with the system - Full list as well as detailed explanation are available here. https://neovim.io/doc/user/options.html
After saving :w, you can quit again, or type :source % to reload the new options.
Keymap
Keymapping is intended to create a shortcut to repeat one or a combination of commands. The default keymap of Neovim is quite powerful, but I still want to customize it a bit more to suit my habits / preferences.
Create keymap
Basic syntax to set a keymap
{context} {attribute?} {input} {result}

in there

{context} - the context in which this shortcut can start
{attribute?} - attribute, optional, can be any of the following: <buffer>, <silent>,
      <expr> <script>, <unique> and <special>. Can have multiple attributes at the same time
{input} - is one or a combination of keys you want to press to launch this shortcut
{result} - is a combination of default keys or specific commands to produce the result you want
For example, while in Insert Mode, I find reaching <Esc> to return to Normal Mode is a bit expensive, so I want while in Insert Mode, I can press jj To exit, I will declare in the config file one more line as
imap jj <esc>
Types of context
The default when declaring a map is that it will be recursive. Suppose you map j to k, and k to j => when you press j it will forward call to k, k forward call to j and ?To avoid If this happens, then VimScript has a declaration of nore - no recursive. Here are the available contexts
| Flag | Mode | Available syntax |
|---|---|---|
| n | Normal mode | nmap nnoremap |
| i | Insert mode | imap inoremap |
| v | Visual + Select mode | vmap vnoremap |
| x | Visual mode | xmap xnoremap |
| s | Select mode | smap snoremap |
| o | Operator Pending mode | omap onoremap |
| ! | Insert + Command Line mode | map! noremap! |
| Normal + Visual + Operator Pending mode | map noremap |
Some keymaps I find useful
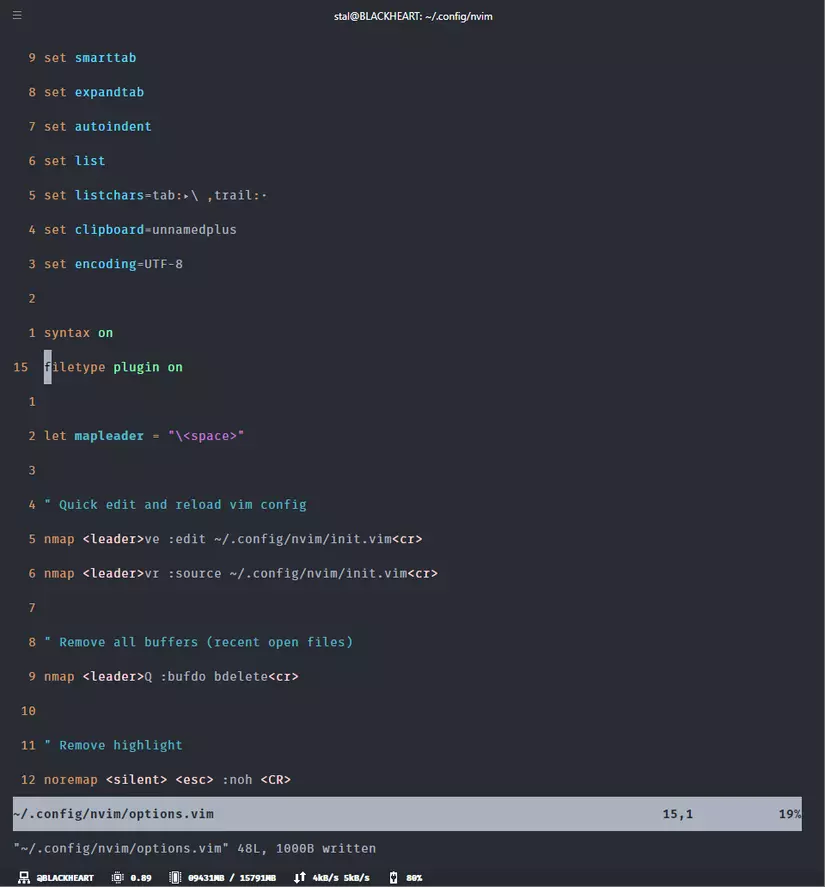
let mapleader = "\<space>"

" Quick edit and reload vim config
nmap <leader>ve :edit ~/.config/nvim/init.vim<cr>
nmap <leader>vr :source ~/.config/nvim/init.vim<cr>

" Remove all buffers (recent open files)
nmap <leader>Q :bufdo bdelete<cr>

" Remove highlight
noremap <silent> <esc> :noh <CR>

" Allow gf to open/create non exists file
map gf :edit <cfile><cr>

" Maintain the cursor position when yanking a visual selection
" http://ddrscott.github.io/blog/2016/yank-without-jank/
vnoremap y myy`y
vnoremap Y myY`y

" Make Y behave like other capitals
nnoremap Y y$

" Quicky escape to normal mode
imap jj <esc>

" Save files the traditional way
imap <C-s> <esc> :w <cr>
nmap <C-s> :w <cr>

" Search selected text
vnoremap // y/\V<C-R>=escape(@",'/\')<CR><CR>
Divide and conquer
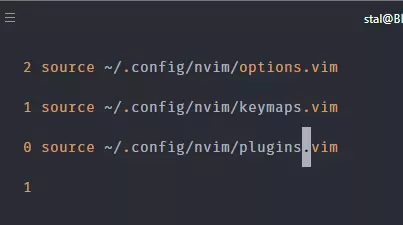
If you follow me, the file init.vim will look like this.
It's a bit messy. But I just configured for options and keymaps. There are tons of plugins to recommend. We will break these configs down for easy management.
- First, type
ggOto make a line at the top of the file and type in:
source ~/.config/nvim/options.vim
-
Return to Normal Mode, press
jto get to the 2nd line, I will see myfiletype plugin online is numbered 14, so I will cut this part with the commandd14j, then presskto go back to line 1. -
in the keymap I have declared
gfto create a file that does not exist, I will put the cursor at the file addressoptions.vimthere (anywhere on the path is okay) and typegfto open. -
press
pto paste the options,kddto remove the extra line due to newline characters, andctrl sto save -
press
:bnto go back toinit.vimfile, pressyypto clone that line of source options.vim -
press
fpto go to wordoptions, pressciwand change tokeymapsthenctrl s -
continue to navigate to the line
let mapleader, this time I will cut off the bottom line with the commanddG -
do the same as above,
kf/gfpkdd,ctr s -
reload with
space vrcommand to see if it's still alright
Plugins
To install the plugin on Neovim first, we need to use a plugin manager. And in this series, I will use VimPlug because it is easy to use and supports both Vim and Neovim.
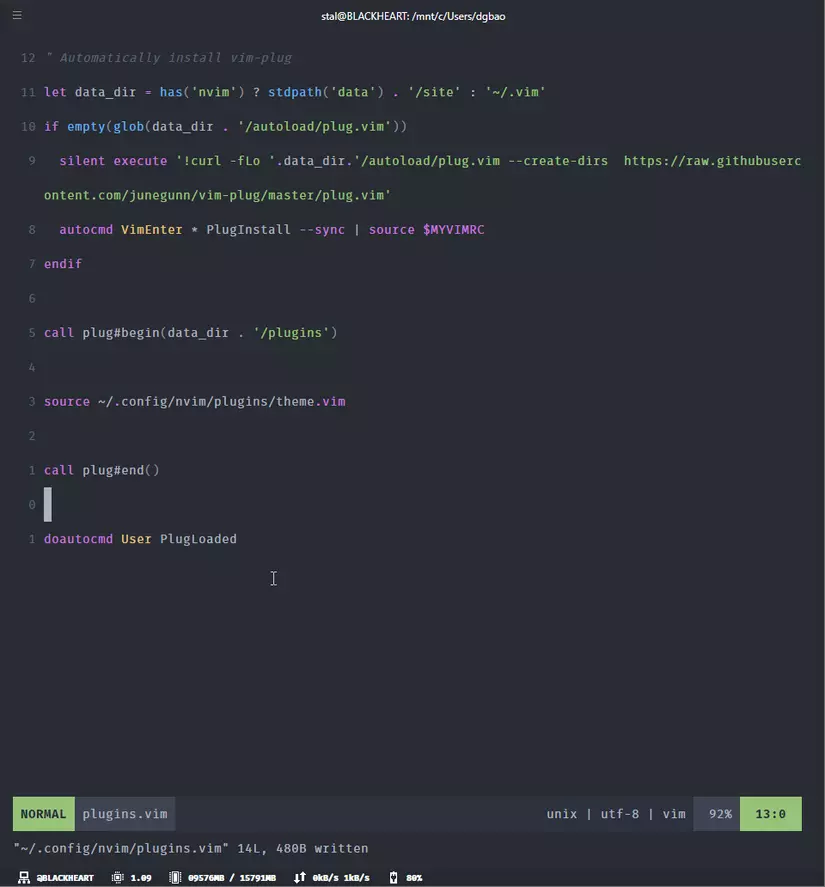
At the file init.vim, we continue to clone 1 more line to the bottom and name it plugins.vim for example, then gf to open the file.
Details of the installation process can be found in the instructions of VimPlug that I linked above. However, I found a trick on the net, to help me install VimPlug by myself, by copying the following and pasting it at the top
" Automatically install vim-plug
let data_dir = has('nvim') ? stdpath('data') . '/site' : '~/.vim'
if empty(glob(data_dir . '/autoload/plug.vim'))
  silent execute '!curl -fLo '.data_dir.'/autoload/plug.vim --create-dirs https://raw.githubusercontent.com/junegunn/vim-plug/master/plug.vim'
  autocmd VimEnter * PlugInstall --sync | source $MYVIMRC
endif

call plug#begin(data_dir . '/plugins')


call plug#end()
You notice the two lines call plug#begin and call plug#end, next, the packages we want to install will need to be placed between these two lines. In addition, the above command will be executed when the VimEnter event occurs, so we need to exit Neovim and re-enter. Next, we can start installing the plugin ?
Theme
Let's start with customtize the statusline, here I use Lightline which is a package to help show the state of the cursor, like Mode, row, column, etc. ..
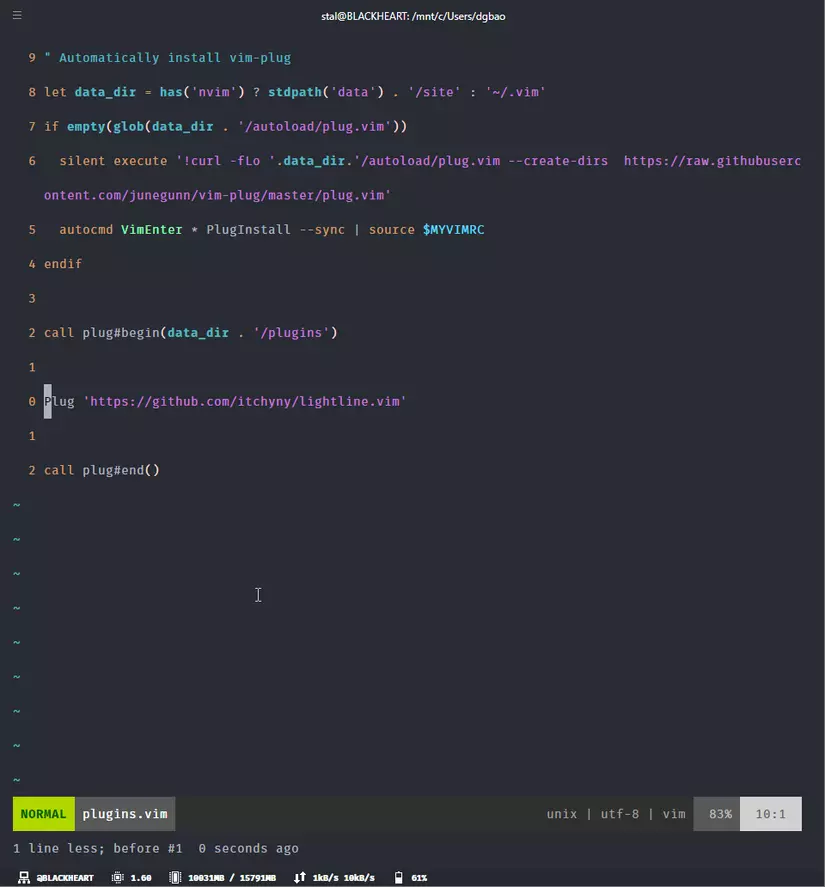
To install a plugin, we will need to declare Plug '<link-github-of-plugin>'. You can make a minimal declaration of the type itchyny/lightline, but you should type it in full to make it easier to open the link. For this statusline we just need to copy the line below and put it between the two lines call plug#
Plug 'https://github.com/itchyny/lightline.vim'
After declaring the plugin's link, the remaining thing to do is:
- Save config
ctr s - Reload config
space vr - Download the plugin
:PlugInstalland press enter - Reload the editor again
space vr - Some plugins may require a restart of the editor to take effect
At this point, there will be a status instead of the default one below, it's not bad at first glance
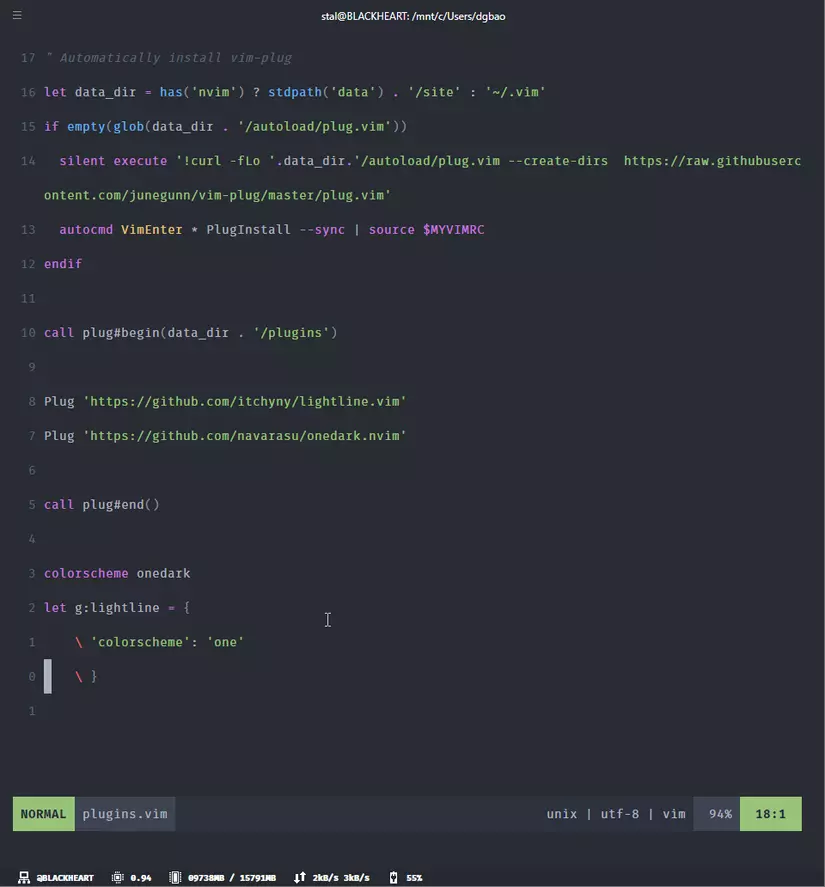
Next is the colorscheme. Here I choose OneDark This is up to each person's taste, you can choose other colors yourself online.
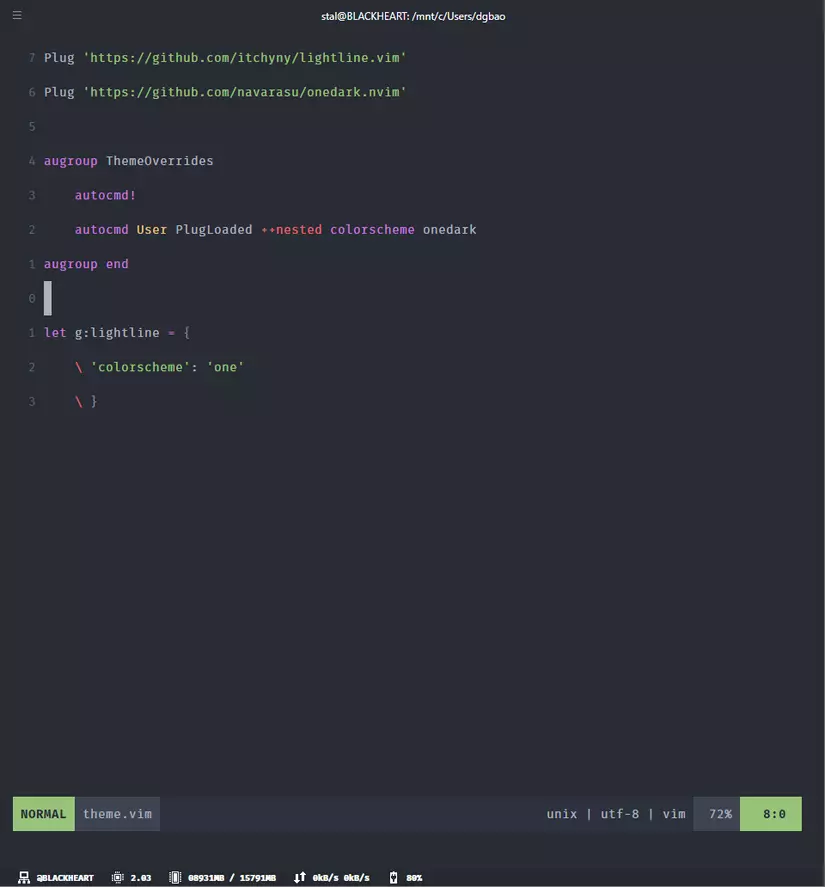
Plug 'https://github.com/navarasu/onedark.nvim'
Continue with the steps to install the plugin. Then we need to define the colorscheme for the editor, and this declaration needs to be under call plug#end(), otherwise the next time we open the editor it will give an error because it can't find colorscheme ? Because I use the onedark theme so I will also declare let lightline use the theme one too
colorscheme onedark
let g:lightline = {
    \ 'colorscheme': 'one'
    \ }
Split plugin config and Auto command
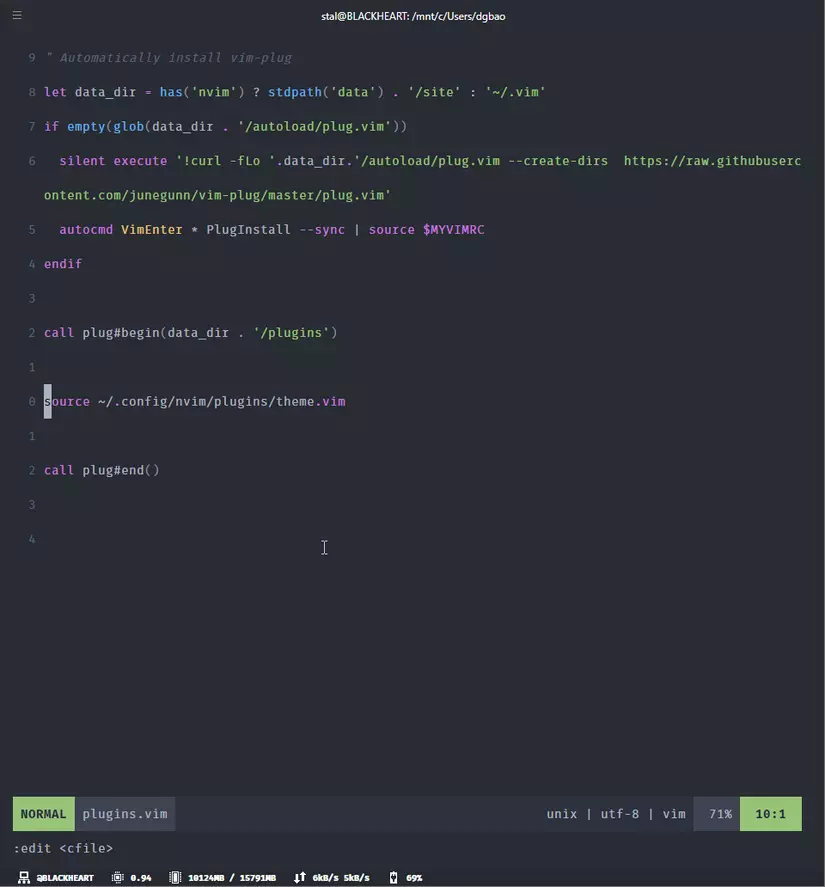
Again, I will continue to break down plugins and their config into separate files, avoiding creating a god file to define plugins. Exit Neovim and create a file theme.vim located in the sub-directory plugins
install -Dv /dev/null ~/.config/nvim/plugins/theme.vim
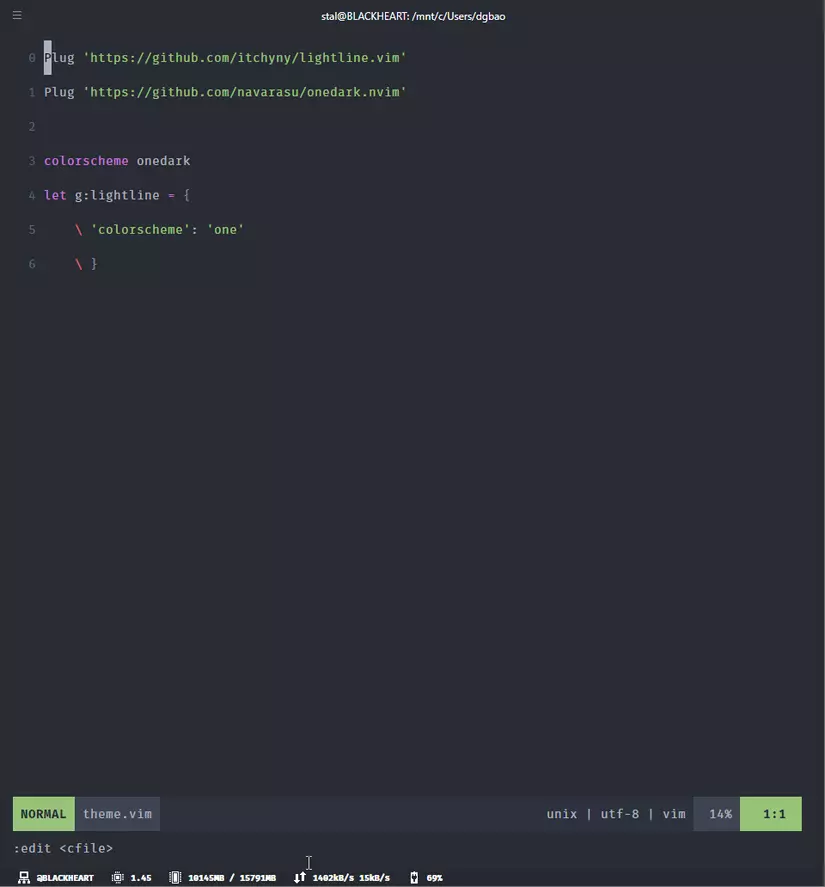
Go back to plugins.vim and move everything related to the statusline and colorscheme into the file theme.vim just created.
Now if you reload the config there will be no problem, but if you restart Neovim, you will see an error like this.
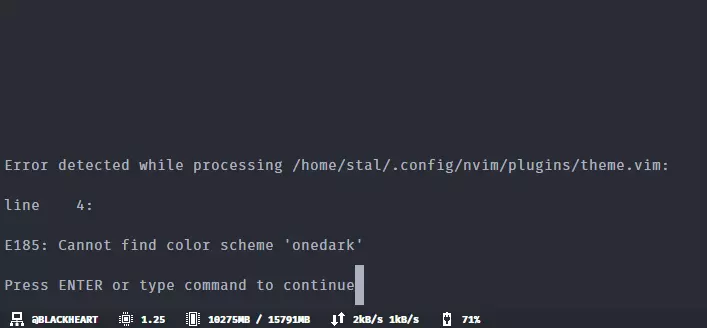
The reason is like I just said above, this source file has put the colorscheme declaration inside call plug#, we need to find a way to get it out again. And I will use Auto Command. First, I will create an event under call plug#, located in the namespace User so that it does not automatically execute, named PlugLoaded for example.
doautocmd User PlugLoaded
Next, in the file theme.vim, I will declare to run the colorscheme command under the namespace of PlugLoaded, that is, when PlugLoaded, I will call colorscheme onedark.
At this point, if you restart Neovim, it will be fine ?
Search files
Navigate between files in a large project is an important thing, and lucky to have a Telescope cover this part. The packages that Telescope recommends include:
Details on how to install are in the link. I use Ubuntu, so I will install it through apt:
sudo apt install ripgrep
sudo apt-get install fd-find
sudo apt-get install fzf
Once done, go back to plugins.vim and add another entry, name it telescope.vim for example.
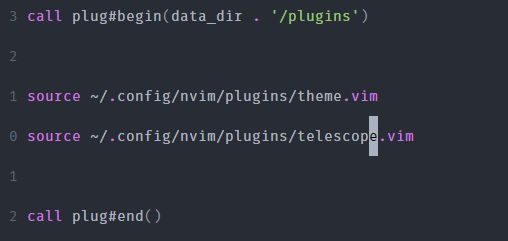
Continue gf into the file and fill in the required packages, as well as the recommended keymap and setup config for Telescope. In addition, I set up a combination of ctr p to find files because it is my familiar shortcut on VSCode
Plug 'https://github.com/nvim-telescope/telescope.nvim'
Plug 'https://github.com/nvim-lua/plenary.nvim'
Plug 'https://github.com/nvim-telescope/telescope-fzy-native.nvim'
Plug 'https://github.com/sharkdp/fd'

" Find files using Telescope command-line sugar.
nnoremap <C-p> <cmd>Telescope find_files<cr>
nnoremap <leader>ff <cmd>Telescope find_files<cr>
nnoremap <leader>fg <cmd>Telescope live_grep<cr>
nnoremap <leader>fb <cmd>Telescope buffers<cr>
nnoremap <leader>fh <cmd>Telescope help_tags<cr>

function SetupTelescope()
lua << EOF
require'telescope'.setup({
    defaults = {
        file_ignore_patterns = { "^./.git/", "^node_modules/", "^vendor/" },
    },
    pickers = {
        find_files = {
            hidden = true
        }
    }
})
require'telescope'.load_extension('fzy_native')
EOF
endfunction

augroup TelescopeOverrides
    autocmd!
    autocmd User PlugLoaded calls SetupTelescope()
augroup END
After installing and quite the editor, let's experience it a little bit by opening nvim in the config directory.
z ~/.config/nvim
nvim .
now you can try ctrl p or space ff to open search by filename, space fg to search for file contents, space fb to open buffers for recently opened files. And a lot of shortcut keys for each screen, you can learn more on the telescope homepage.
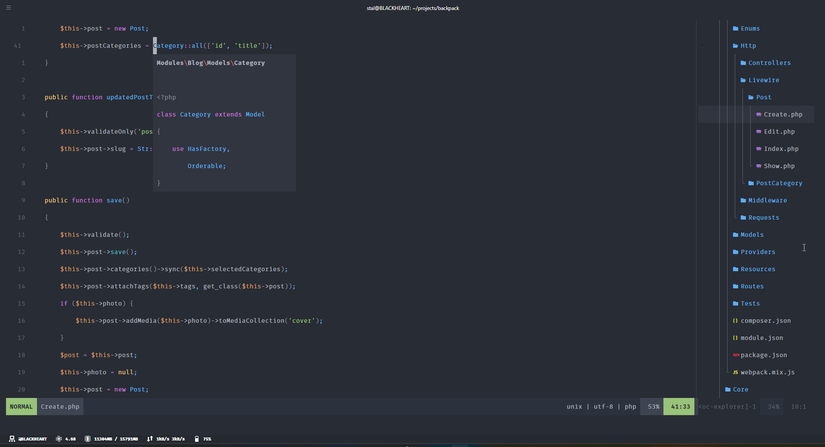
LSP + Treesitter
In order to help increase the code experience of Neovim, we will continue to set up the LSP, popup, and treesitter components that we introduced in the previous post. The first is to create a separate config file, I will set it as intel.vim
Plug 'https://github.com/junnplus/nvim-lsp-setup'
Plug 'https://github.com/neovim/nvim-lspconfig'
Plug 'https://github.com/williamboman/nvim-lsp-installer'
Plug 'https://github.com/hrsh7th/cmp-nvim-lsp'
Plug 'https://github.com/hrsh7th/cmp-buffer'
Plug 'https://github.com/hrsh7th/cmp-path'
Plug 'https://github.com/hrsh7th/cmp-cmdline'
Plug 'https://github.com/hrsh7th/nvim-cmp'
Plug 'https://github.com/hrsh7th/cmp-vsnip'
Plug 'https://github.com/hrsh7th/vim-vsnip'
Plug 'https://github.com/nvim-treesitter/nvim-treesitter', {'do': ':TSUpdate'}

function SetupTreesitter()
lua << EOF
require'nvim-treesitter.configs'.setup {
  ensure_installed = {
      "lua",
      "php",
      "html",
    }
}
EOF
endfunction

function SetupLsp()
lua << EOF
require('nvim-lsp-setup').setup({
    mappings = {
        gf = 'lua vim.lsp.buf.formatting()',
        gd = 'lua require"telescope.builtin".lsp_definitions()',
        gi = 'lua require"telescope.builtin".lsp_implementations()',
        gr = 'lua require"telescope.builtin".lsp_references()',
    },
    servers = {
        intelephense = {},
    },
})
EOF
endfunction

function SetupCompletion()
lua <<EOF
  local cmp = require'cmp'

  cmp.setup({
    snippet = {
      expand = function(args)
        vim.fn["vsnip#anonymous"](args.body) -- For `vsnip` users.
      end,
    },
    mapping = cmp.mapping.preset.insert({
      ['<C-b>'] = cmp.mapping.scroll_docs(-4),
      ['<C-f>'] = cmp.mapping.scroll_docs(4),
      ['<C-Space>'] = cmp.mapping.complete(),
      ['<C-e>'] = cmp.mapping.abort(),
      ['<CR>'] = cmp.mapping.confirm({ select = true }), -- Accept currently selected item. Set `select` to `false` to only confirm explicitly selected items.
    }),
    sources = cmp.config.sources({
      { name = 'nvim_lsp' },
      { name = 'vsnip' }, -- For vsnip users.
    }, {
      { name = 'buffer' },
    })
  })

  -- Use buffer source for `/` (if you enabled `native_menu`, this won't work anymore).
  cmp.setup.cmdline('/', {
    mapping = cmp.mapping.preset.cmdline(),
    sources = {
      { name = 'buffer' }
    }
  })

  -- Use cmdline & path source for ':' (if you enabled `native_menu`, this won't work anymore).
  cmp.setup.cmdline(':', {
    mapping = cmp.mapping.preset.cmdline(),
    sources = cmp.config.sources({
      { name = 'path' }
    }, {
      { name = 'cmdline' }
    })
  })

EOF
endfunction


augroup LspOverrides
    autocmd!
    autocmd User PlugLoaded calls SetupTreesitter()
    autocmd User PlugLoaded calls SetupLsp()
    autocmd User PlugLoaded calls SetupCompletion()
augroup END
This is a sample config for a basic php project, which I used intelephense. You will see that I have divided this setup into 3 functions for easy visualization
- in
SetupTreesitter(), you need to pay attention to add the languages you want to theensure_installedobject, or replace that object with"all"to install (about 160 languages) - in
SetupLsp(), I use the package nvim-lsp-setup to cover most of the difficult parts for me, the rest I just declare Report more integrated keymap telescope and LSP that I use, namely intelephense. See the default keymap in the document on the link above. In addition, you need to pay attention to the requirements of LSP at https://github.com/neovim/nvim-lspconfig/blob/master/doc/server_configurations.md. For example, if I useintelephense, I need to install npm packageintelephenseat global level (npm i -g intelephense) and add the lineintelephense = {},inside objectservers - for
SetupCompletetion(), you just need to pay attention to setup keymap ?
And other plugins
After completing the installation as above, our Neovim is already quite like an IDE ? And you should have figured out how to install plugins. In this section, I will list other plugins that I use for daily workflow so that you can learn and install them yourself
- Coc Explorer - is an extension of Coc, this plugin for you an extremely beautiful, fully functional explorer UI for navigating + manipulating file/directory
- Github Copilot - virtual assistant suggests super cool code
- EasyMotion - navigate in screen, extremely fast and easy.
- Floaterm - open a popup terminal right in the editor and use
-
NerdCommeter - add an action
gcto comment. for examplegccto comment the current line,gc4jto comment the current line and the 4 lines below. -
Surround - adds a count
sto work with around similar to [combination with inside/around](https://viblo. asia/p/vim-la-gi-va-tai-sao-nen-hoc-su-dung-6J3ZgR0gKmB#_to-hop-voi-insidearound-10). For example, if we want to change"hello"to'hello', we just need to usecs"' - Neoformat - format uses prettier
- Sayonara - disable files and delete from buffers (recent files)
- NeoScroll - smoother scroll
-
WordMotion - splits words written with
camelCaseorsnake_case
And much more...
Summary
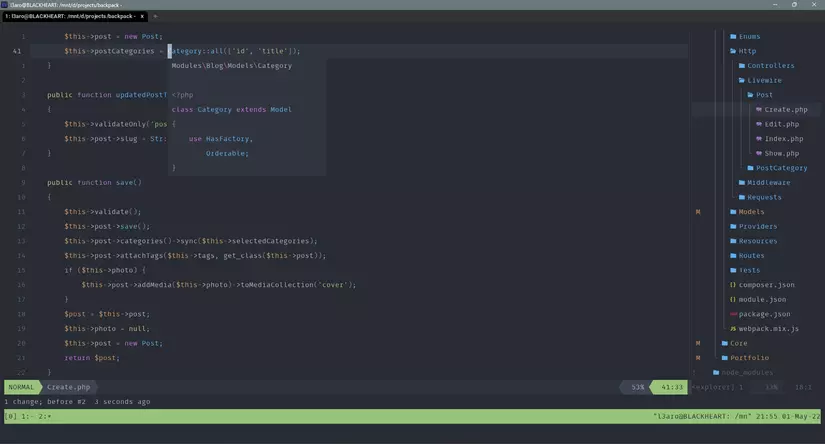
We've just gone through how we turned Neovim into a fully functional code editor. Hopefully through this article, you will be familiar with how to install it as well as using Vim through the examples.
In addition, you can refer to the full version of my dotfiles. Here is a preview of the Neovim that I used, the same spotlight as the photo above
See you in the next times